

A graduated neutral density filter (GND) is a piece of glass that is darker at one end than at the other, as the ‘graduated’ bit in its name suggests.
Its main use is to balance out the brightness of a scene when part is well-lit and another part is less well illuminated, for example a landscape shot across a field where the land is much darker than the sky.
If you expose for the land the sky will be over-exposed, whilst if you expose for the sky the ground will be under-exposed. The solution is to balance the brightness of the two so one exposure works for both.
The usual way to achieve this is to use a neutral density filter to reduce the brightness of the sky. By holding it in front of the lens with the dark glass covering the sky and the clear glass covering the ground part the brightness is balanced out, and the result is an evenly exposed shot.
The technique relies on you having the right ND filter with you, of course. If you’ve forgotten your ND filters all is not lost though, so long as the demarkation between bright and dark is a straight line.
Mount your camera on a tripod and dial in settings to give you a two or three-second exposure that’s right for the dark area.
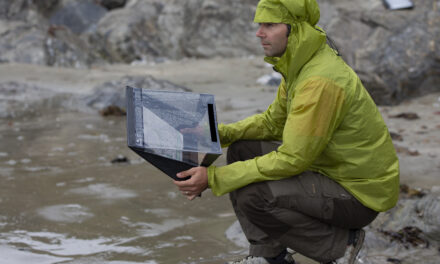
Hold a piece of black card, material or even your camera strap in front of the lens, aligning it with the horizon so you cover only the excessively bright sky area.
Press the shutter release and move the card/camera strap out of the way half-way through the exposure. This gives the bright area half the exposure time given to the dark area.
If the effect isn’t quite right, try varying the time you keep the sky covered until you get the right effect.
If you hold the cover so its edge aligns with the dividing line on your image, and move it away sharply, it wont show up in your image.
It’s perhaps not as good as an expensive GND filter, and it really only works when there is a straight line, but it’s a technique that can turn an impossible shot into a successful one.


